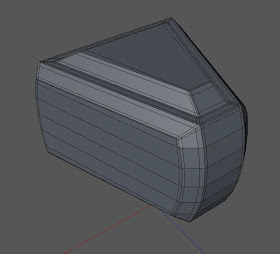
I felt that the tentacle was the most important part to figure out or the model would be a flop. I went ahead with the rubber core/plastic knuckle design but I still needed a way to to pose the tentacle. While the rubber core would make it super-flexible, it wouldn't hold a position. I decided to insert a brass rod through the length of the tentacle much like they do for stop motion puppets. The rubber would give it flexibility while the brass rod would hold the shape.
I took precise measurements of the brass rod so I could model the correct size hole through the rubber core.
I used a deformer to shape the tentacle and then used the core to boole (cut-out) a hole through all the knuckles. This has to be absolutely precise in order for the rubber to fuse to the plastic. If it’s off at all, the print will fail.
The parts then have to be exported as STL files for the printer. STL files describe just the surface geometry of the piece which the printer uses to slice up and build the model. I had to export parts of the tentacle as separate STL files based on what material they will be printed with. I output one STL with the rubber core and suckers and another with the plastic knuckles.
The finished tentacle with armature wire installed. It worked out pretty well. The knuckles have fused to the rubber and stay put like they should. Take a look at slide show below for a detailed account of the printing process.
UPDATE: just added this video which covers most of what's below.
Flash forward a couple of weeks and the tentacle has been manhandled by many curious people and has started to fall apart. This is a good thing since I can learn from it. The rubber is tearing where it meets the knuckle. This is partly because I made the rubber core pretty fat and it actually works against itself when flexing and puts a lot of strain right at the knuckle.
The other problem is the print lab accidentally printed the tentacle with the wrong orientation. Think of cutting a piece of lumber from a tree. When it's milled, the grain goes along the board for strength. If the grain went across the board the entire piece would have weak spots and crack at multiple points across the board. Printing the rubber is the same idea. It should have been printed with the tentacle going longways across the print bed so the 'grain' of the rubber goes with the direction of the print head. But it was accidentally turned perpendicular so the grain goes the short way across the rubber core, lining right up with the stress spots near the knuckle and making it tear.
The other problem is the print lab accidentally printed the tentacle with the wrong orientation. Think of cutting a piece of lumber from a tree. When it's milled, the grain goes along the board for strength. If the grain went across the board the entire piece would have weak spots and crack at multiple points across the board. Printing the rubber is the same idea. It should have been printed with the tentacle going longways across the print bed so the 'grain' of the rubber goes with the direction of the print head. But it was accidentally turned perpendicular so the grain goes the short way across the rubber core, lining right up with the stress spots near the knuckle and making it tear.
I also feel that the armature wire was thicker than it needed to be and contributed to the rubber tearing toward the tip where it was the thinnest. Overall a great start and good learning experience.
Having done this test, I feel confident about modeling everything correctly. It also made me realized how important the workflow is with this type of project. If you boole something out of order or take it into ZBrush at the wrong time it can be disastrous. I had to rebuild the tentacle due to improper booling on the first version. If I had not caught it, the print would have failed and cost me money. I also had to be careful of keeping all the geometry watertight and avoid manifold edges. But with all of this in mind and a properly organized workflow it should work out fine.


